CLOTHING + INTERIOR DÉCOR
Sound-absorbing convertible clothing/décor for award-winning design studio

Overview
My roles: Art director and designer
Industry: Fashion and interior design
Duration: 6 months
THE CHALLENGE
To create an impactful, cohesive, and sustainable fashion collection that addresses two main questions:
- How can we reuse and repurpose existing plastics so that we can avoid manufacturing more?
- How can we push sustainability and create designs that serve more than one function?
THE CLIENT
Design + Conquer is an award-winning fashion and accessories studio based in Vancouver, Canada. Founded by Morgan Mallett in 2009, DC’s work has been featured in Harper’s Bazaar, ELLE, in film and television, and in boutiques and museums around the world.

MY ROLES + RESPONSIBILITIES
• Creative director
• Designer
• Concept developer
• Pattern maker
• Materials sourcer
• Production coordinator
• Location scout
• Casting director
• Photo shoot art direction + coordination
• Stylist
• Photo retoucher
• Graphic designer
• Motion graphic designer
• Editor
• Publicist
OUTPUTS
• 8-piece garment and decor collection
• 50+ successful product/campaign photos
• 1 promotional video
• 8+ digital patterns
• 1 press pack
• 1 ecommerce site
• 10+ social media assets

Above: Initial historical mood board research for the Decrypt collection
Phase 1: discovery
HISTORICAL RESEARCH
I also explored historical references for inspiration for the collection’s theme. It was during this process that I learned about—and became fascinated by—the allied WW2 codebreakers at Bletchley Park.
MATERIALS RESEARCH
I researched recycled and recyclable materials so that I had a better idea of what was out there, and how these materials were being used. This involved looking at materials used in all kinds of industries…from the automotive and construction industries, to the interior design and fashion design industries.

Above: rPET and wool felt materials testing
Phase 2: research + define
I’d identified diverse materials in my discovery phase, and it was time to narrow down options that would mesh well with my military-inspired theme.
- I found that rPET felt (Recycled Polyethylene) was a highly functional option. I sourced samples from vendors in North America, Europe and Asia, and tested them for tensile strength, structure, fraying, pilling, and colourfastness.
- I chose a vendor whose rPET felt was great quality, was fully recyclable, came in a variety of thicknesses and colours, and was affordable. This happened to be a company whose felt was used mainly in sound absorption panels in noisy interiors.
- Once I received samples of the felt, I tested it with a laser cutter to see how cleanly it would cut and score.
- I sourced fastenings from companies in the US and Asia, and tested them (sewing and glueing) on pieces of felt.
- I researched different colourway possibilities.


Above: (Top) Sketches and paper 1/4 scale garment mockups. (Bottom) Vector pattern made in Adobe Illustrator.
Phase 3: design + ideation
PROTOTYPING + IDEATION
- I created 30+ paper garments on a 1/4 scale dress form to test ideas efficiently and economically. This helped shape and refine the voice of the collection.
- I cut these paper designs off the dress form, flattened them, and photographed them from above. This helped quickly transition the 3D mockups into flat patterns as well as visualize how they’d look as wall hangings.
- I digitised the patterns in Adobe Illustrator so that I could edit patterns easily, repurpose designs for ideations, and have a usable file format that a laser cutter could use.
- I purchased and imported rolls of rPET felt in colours that edified the collection theme. I purchased well ahead of time as I anticipated that the import process can take a long time.


Above: Sizing paper patterns up from 1/4 to full-scale on the dress form, and cutting fabric from these patterns
REFINFING + EDITING
- I sized up two of the digital patterns I’d created and built full-scale paper mockups. I tested these for fit on a full-sized dress form and directly on the body. This helped me avoid materials waste, and gave me a more realistic understanding of how the designs worked at full-size.
- I constructed one full-sized garment/wall hanging with the actual felt, to see how it would drape, and to test fastenings. This was done to save time in the long run, prevent material waste, and to give me a more hands-on understanding how the garments would work.
- I created the rest of the the full-sized paper designs down from (12 were edited down to 8), removing redundancies and experimenting with the placement of fastenings, slits and tabs.
- I executed all of the full-scale paper designs in felt to troubleshoot any fit and design issues. This was done both on the dressform and on the body. Adobe Illustrator patterns were adjusted accordingly.
- I sent a single pattern to a local laser cutting company, so that they could perform test cuts, and so that I could test the quality of their work.
- The sample garment looked great and tested well on the body, and I sent over the rest of the digital patterns in the collection to be cut.
- Once I received the finished garments from the laser cutter, I tested them again on the body, and made small edits to the digital pattern’s slits and scoring. This helped save me time and money in the long run, and refined the designs.
- The final digital patterns were sent to the laser cutter, and the final designs were produced.

Above: Mood board for the photo shoot
ART DIRECTION
Throughout Phases 1 – 3, I researched historical garments, lighting effects, set decor, hair and makeup looks, and potential models. This helped me with mood board and photo shoot concept development. This research not only clarified the look and feel of the collection, but helped communicate my creative direction with the photographer and on-set collaborators. I sourced styling items for the shoot, including clothing, footwear, and accessories options. Doing this well in advance of the shoot helped me secure items I needed, while still having time to tweak my creative direction. I also took photos of the items I sourced and added them into the mood boards I created, so that I could share them with the photographer, makeup artist, and hair stylist I’d be working with on the shoot.
CASTING TALENT
- I chose to hire two photographers—one who specialised in editorial-style shoots, and another who specialised in product photography. I’d worked with both previously.
- I carefully chose a model from a local agency who fit the clothes well, and was compatible with the vibe of the shoot and our budget.
- I reached out to local hair and makeup talent, and hired two artists I knew were able to achieve the effects I wanted with the specific model I cast.
- I connected all team members with each other and shared the shoot’s mood board. This helped the team collaborate and coordinate ourselves in advance, saving time.

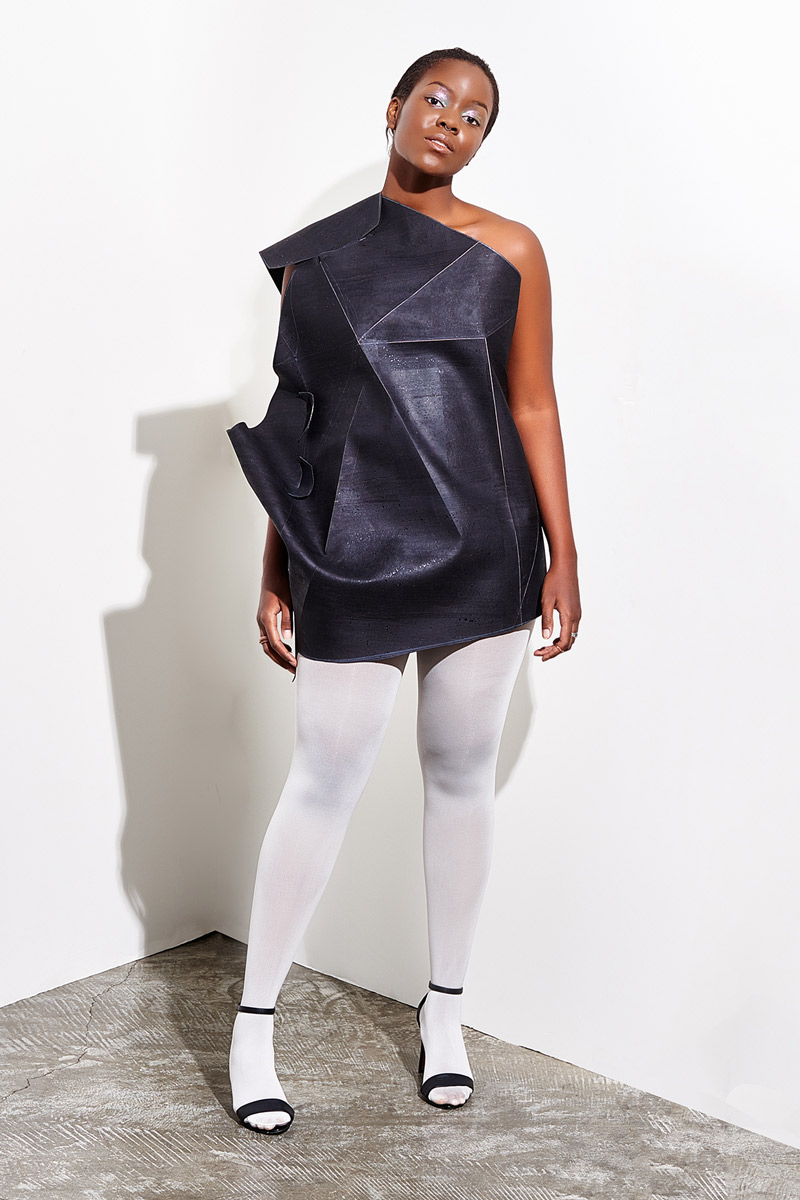
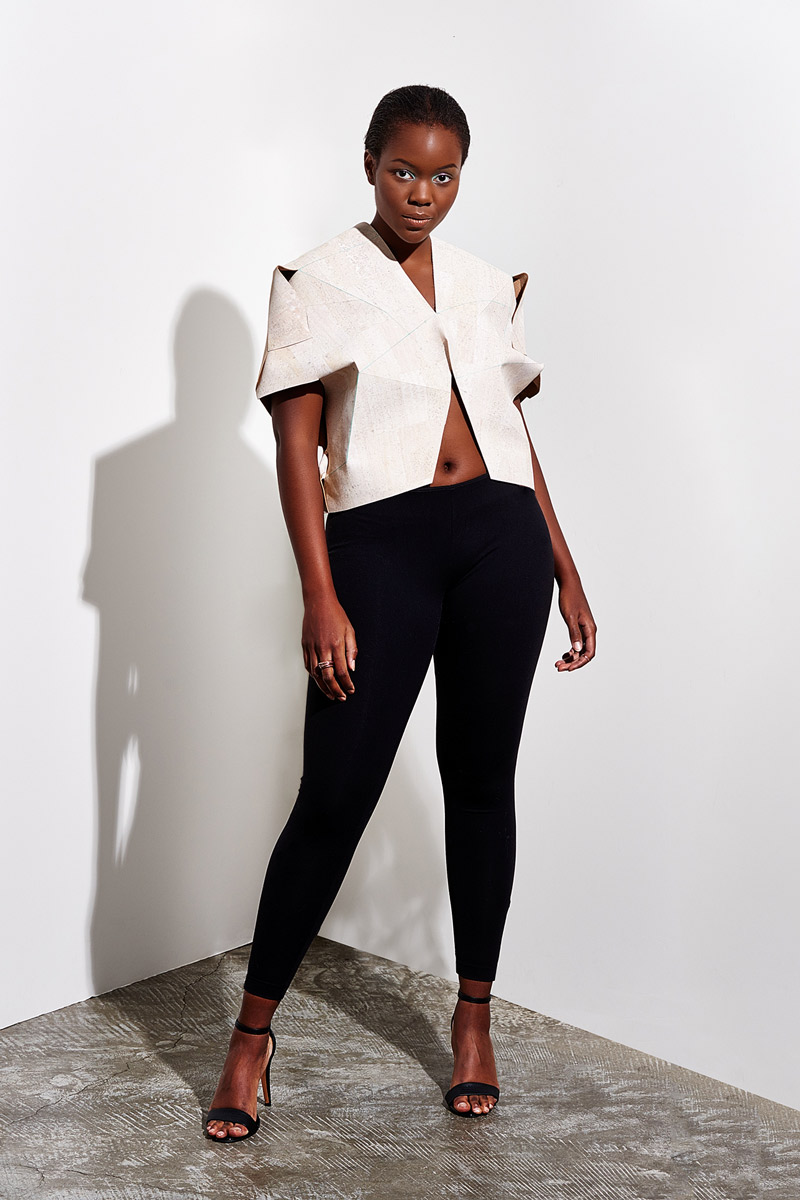
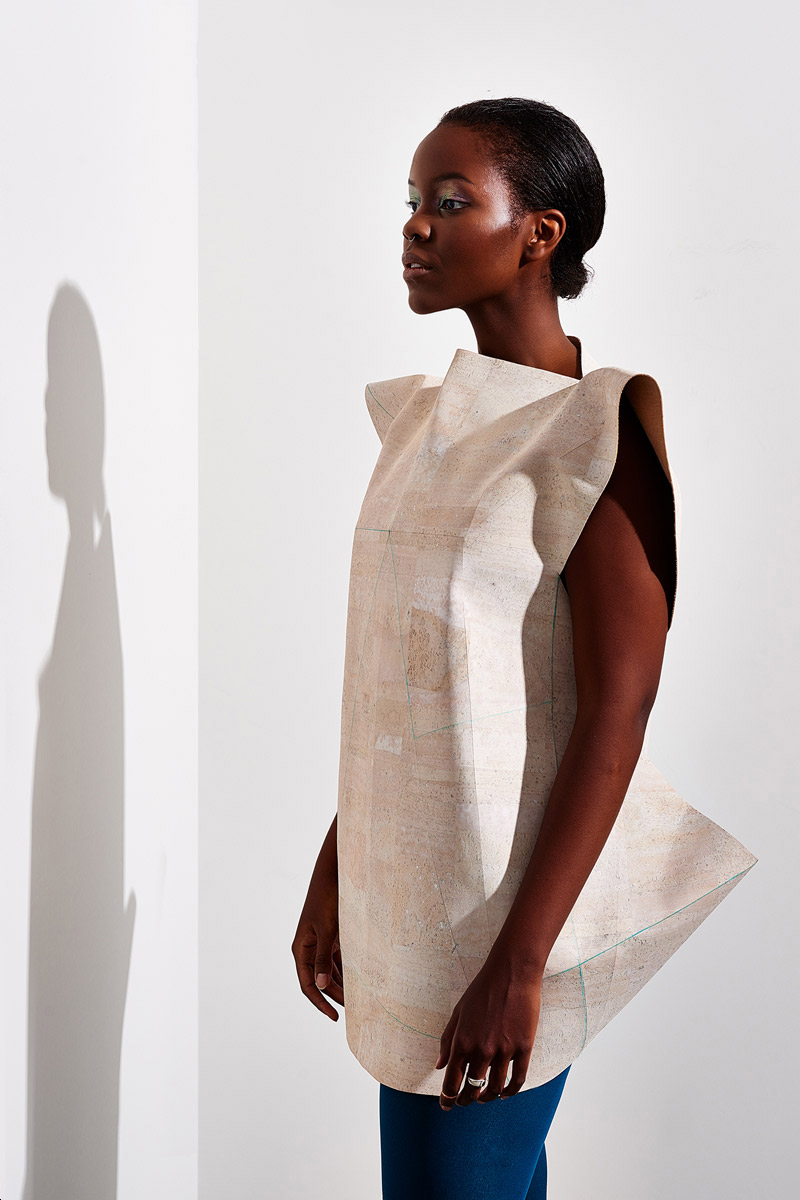
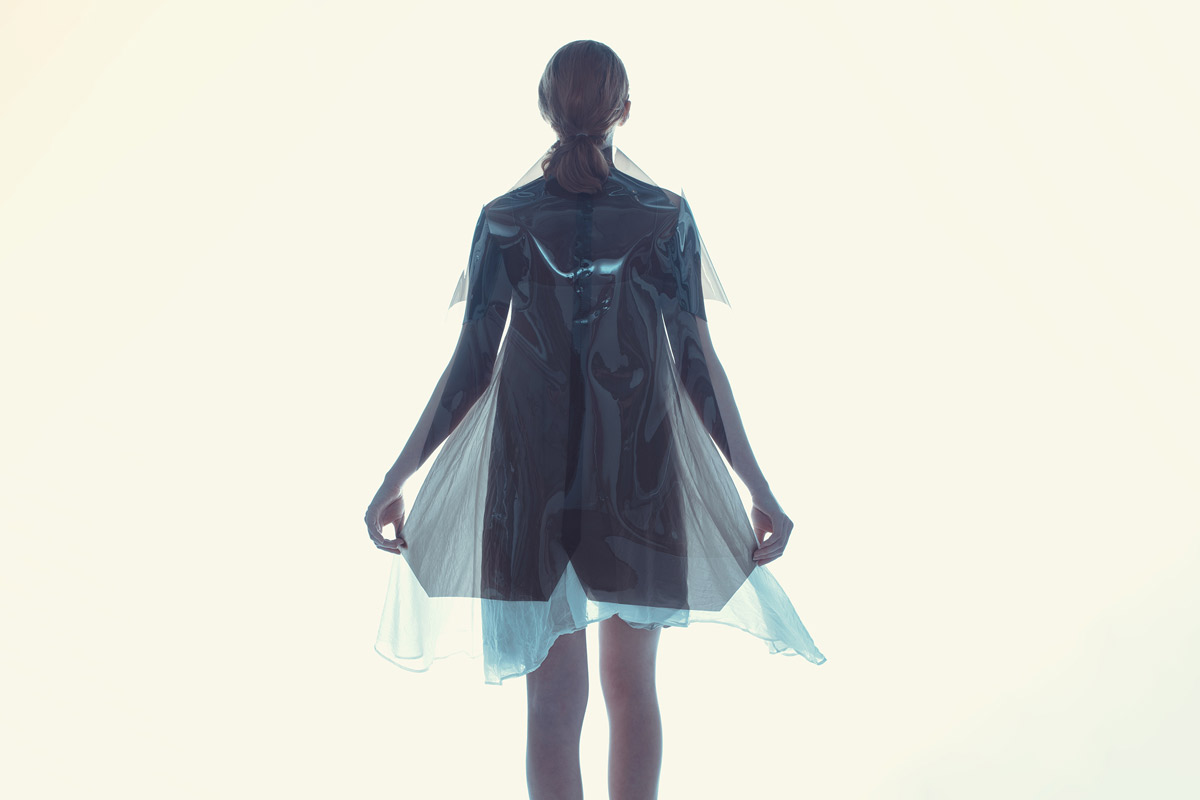
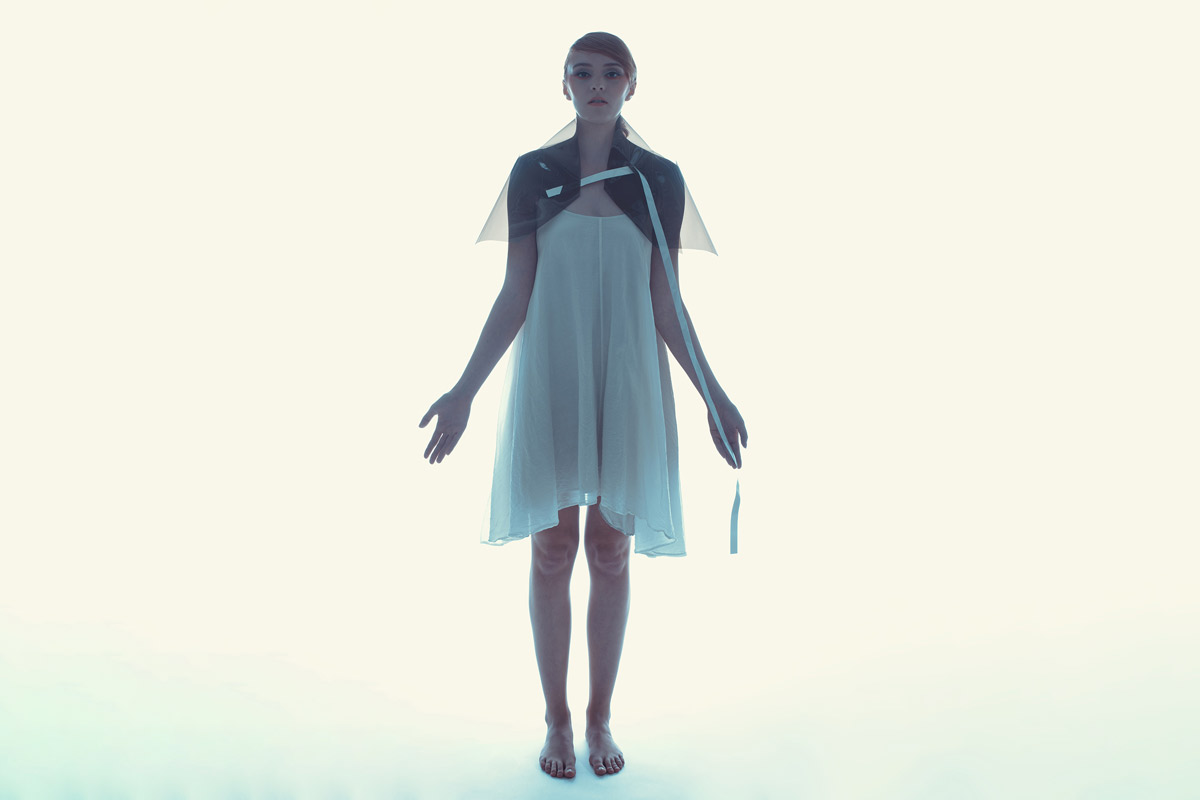
Above: On set at the collection photo shoot
LOCATION SCOUTING
During the ideation phase, I successfully secured a two centrally located studio spaces that met the team’s needs. One was used for the model shoot, and the other was used to shoot wall hangings. This helped us stay on budget, as the wall hangings shoot location was much less expensive to rent.
PHOTO SHOOT COORDINATION
I art directed a two-day photoshoot in the selected locations (two separate days of shooting in total), overseeing the entire process and resulting in 50+ successful images used in the final campaign.
Above: Collection teaser video
Phase 4: delivery and implementation
- Collaborated with team on campaign photoshoot.
- Worked with both photographers on initial photo editing, helping to establish a consistent tone across the campaign.
- Edited the photos and made final selects. This allowed me to create the results I wanted.
- Created and edited a teaser video for the collection, including sound design and motion graphics (see above or click here to view).
- Updated Design + Conquer’s e-commerce site with final photos, product descriptions, and the collection preview video.
- Designed a digital press pack (including creating copy for a press-release) and sent this to 50+ media contacts in Canada, the US and Europe, and promoted the collection via social media.
Above: Interview with designer Morgan Mallett on CBC News (Canada’s national broadcaster). Click here to view the full video.

Above: Press in The Vanilla Issue (Australian fashion news website).
Results
• A cohesive and impactful 8-piece collection and promotional video
• International sales
• Worldwide press
• Enquiries for use of designs in film + TV, and fashion editorials
FUTURE CONSIDERATIONS
If I’d had more time, I would have shot more video so that it could be used in ecommerce and in the collection preview video.
WHAT WAS LEARNED?
I learned how long the materials import process can take, how many steps are involved, and how many fees are involved. I also learned that using the most sustainable materials might mean shipping them from farther away than originally intended, which impacts the overall sustainability of a product.